Obstacle Placement and Scenario Management
Basic Control
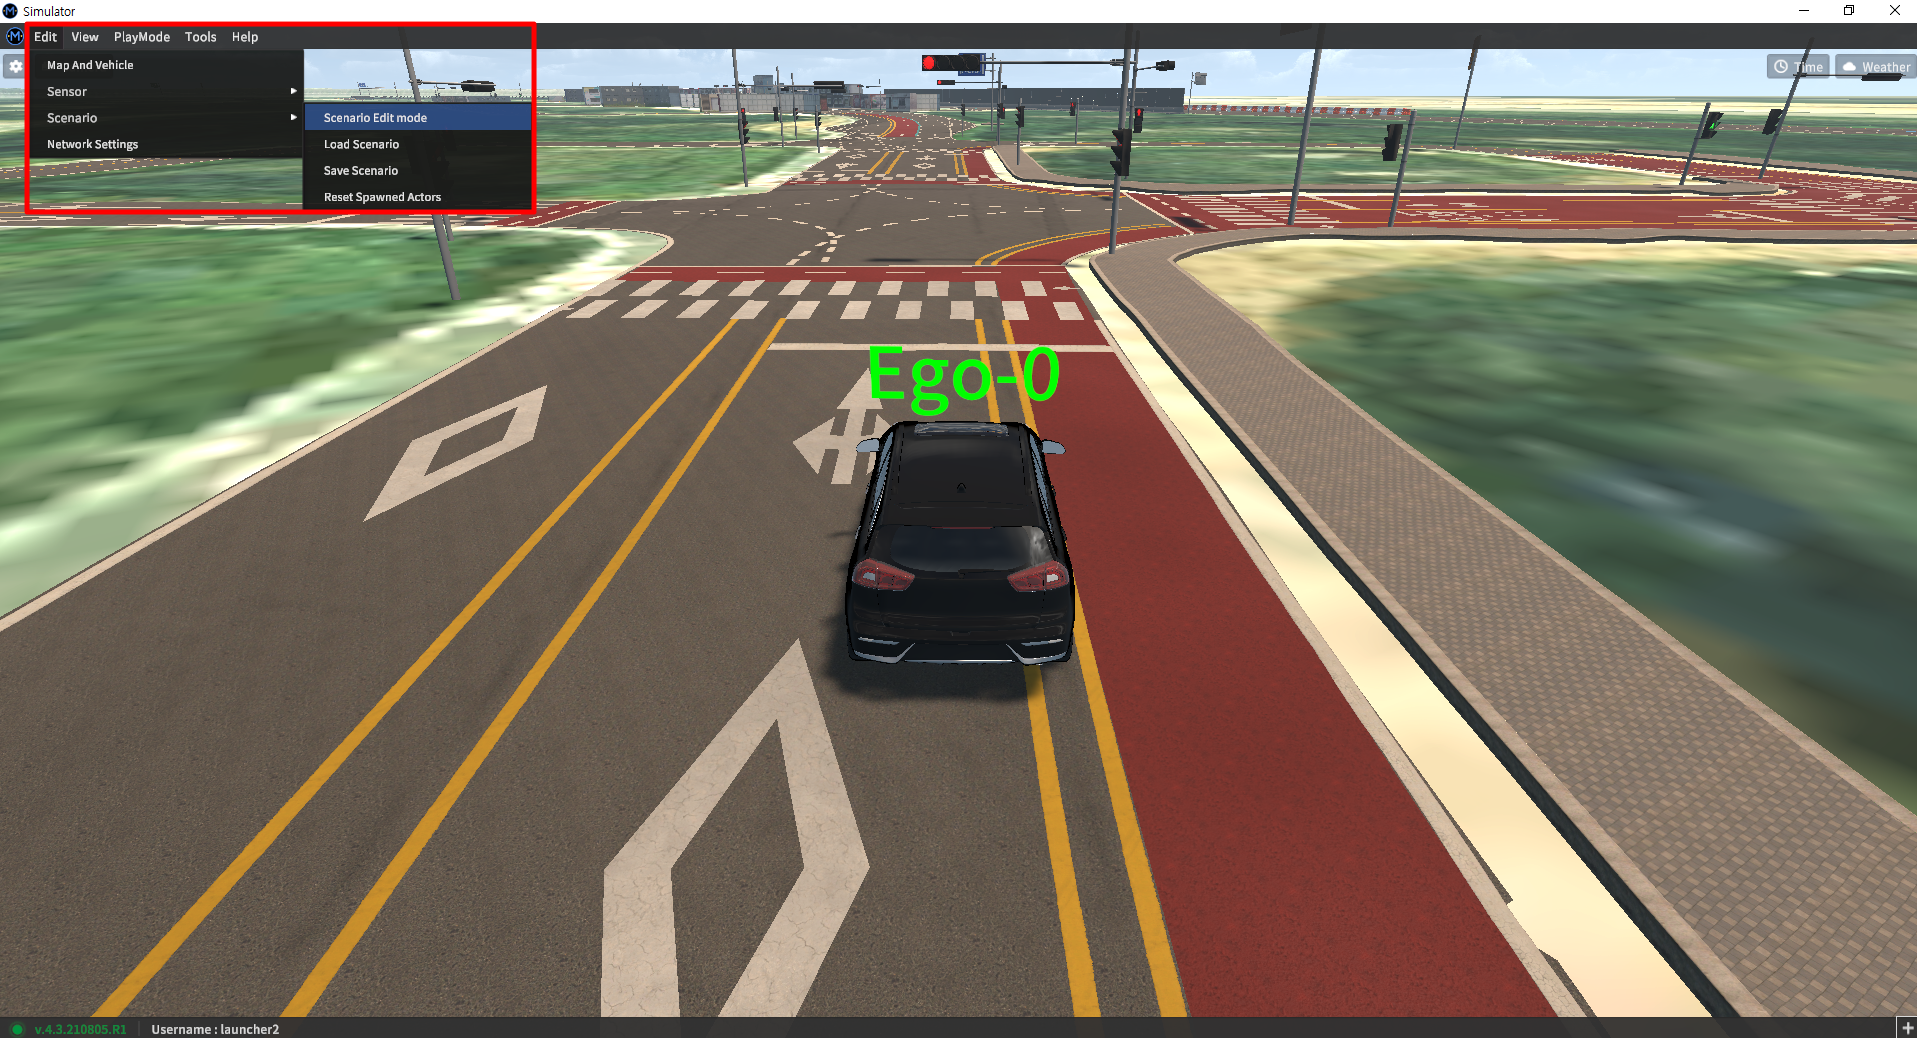
You can create, place, and delete obstacles in Edit - Scenario - Scenario Edit mode.
Vehicle Placement
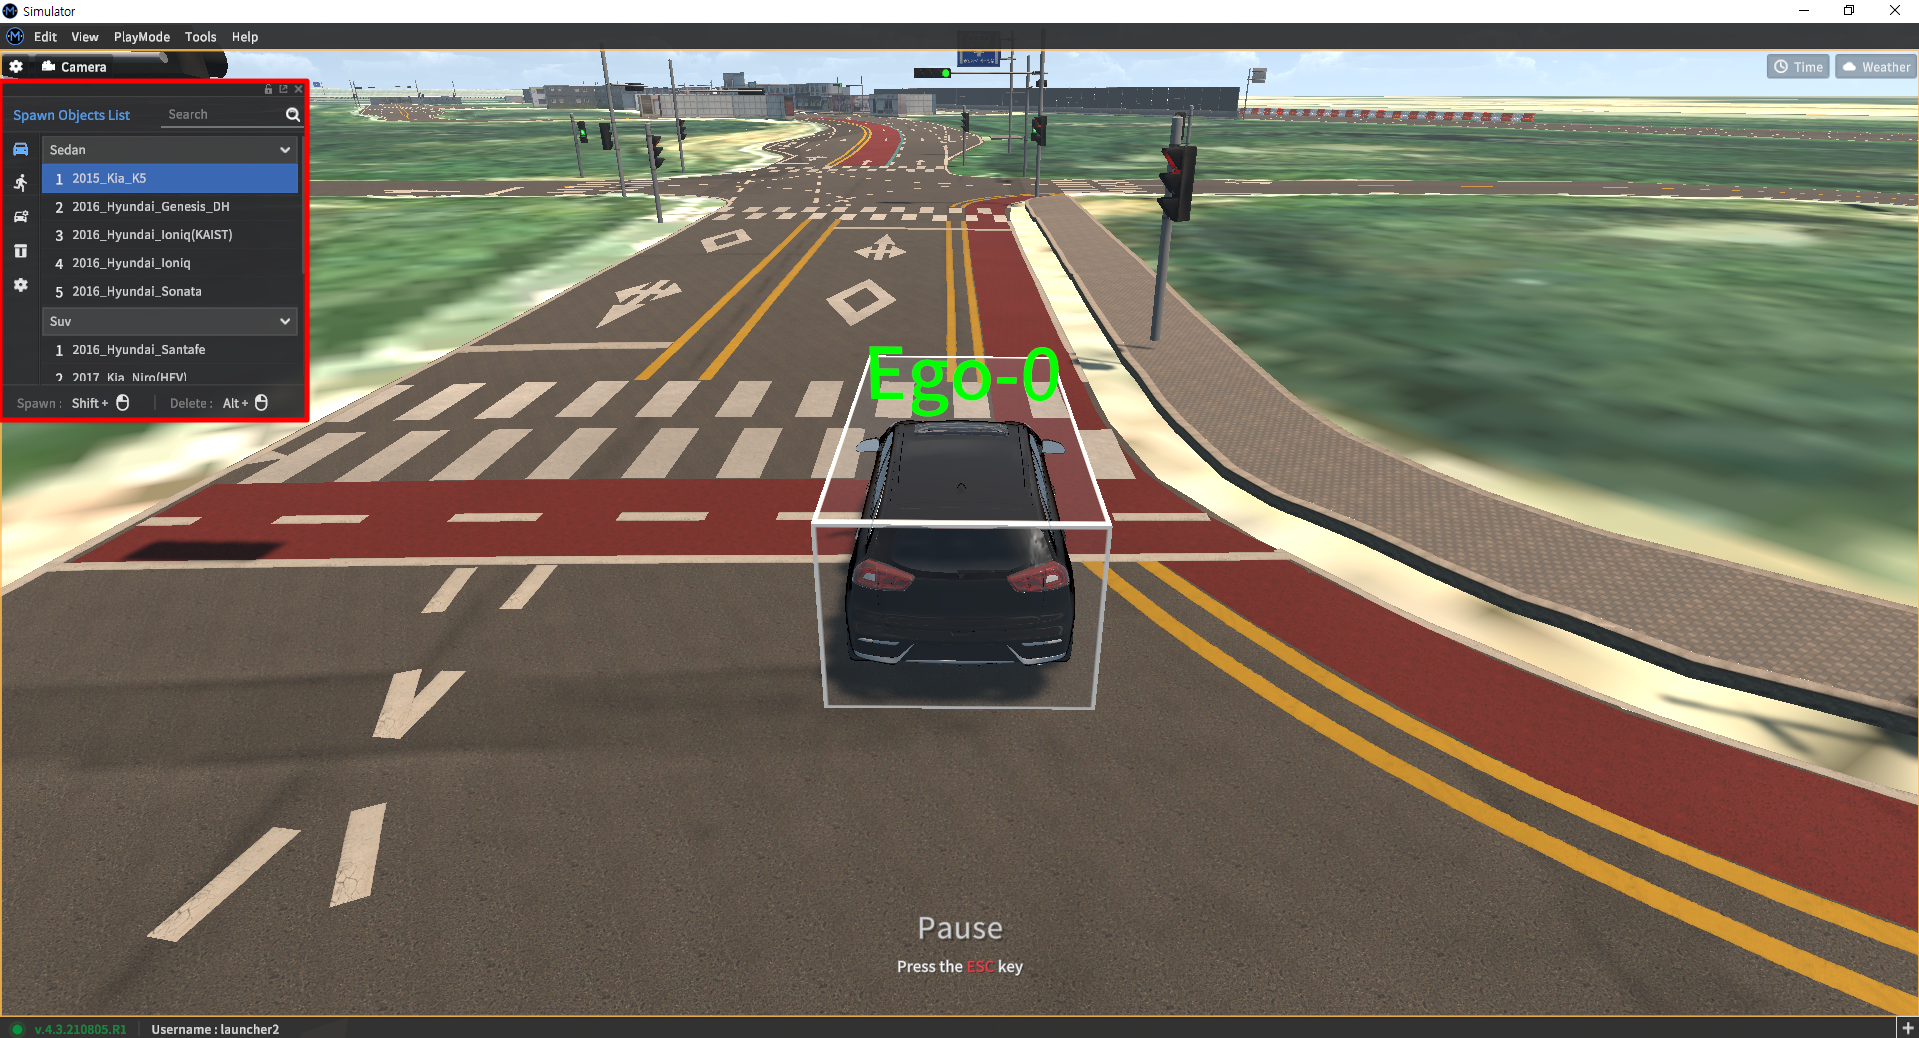
Spawn Objects List - Select Vehicle Icon
Select the desired Vehicle Type
Shift + left click to create vehicle and Alt + left click to delete
Vehicle can only be placed above linked path.
Reference video
Pedestrian placement
Unit Pedestrian
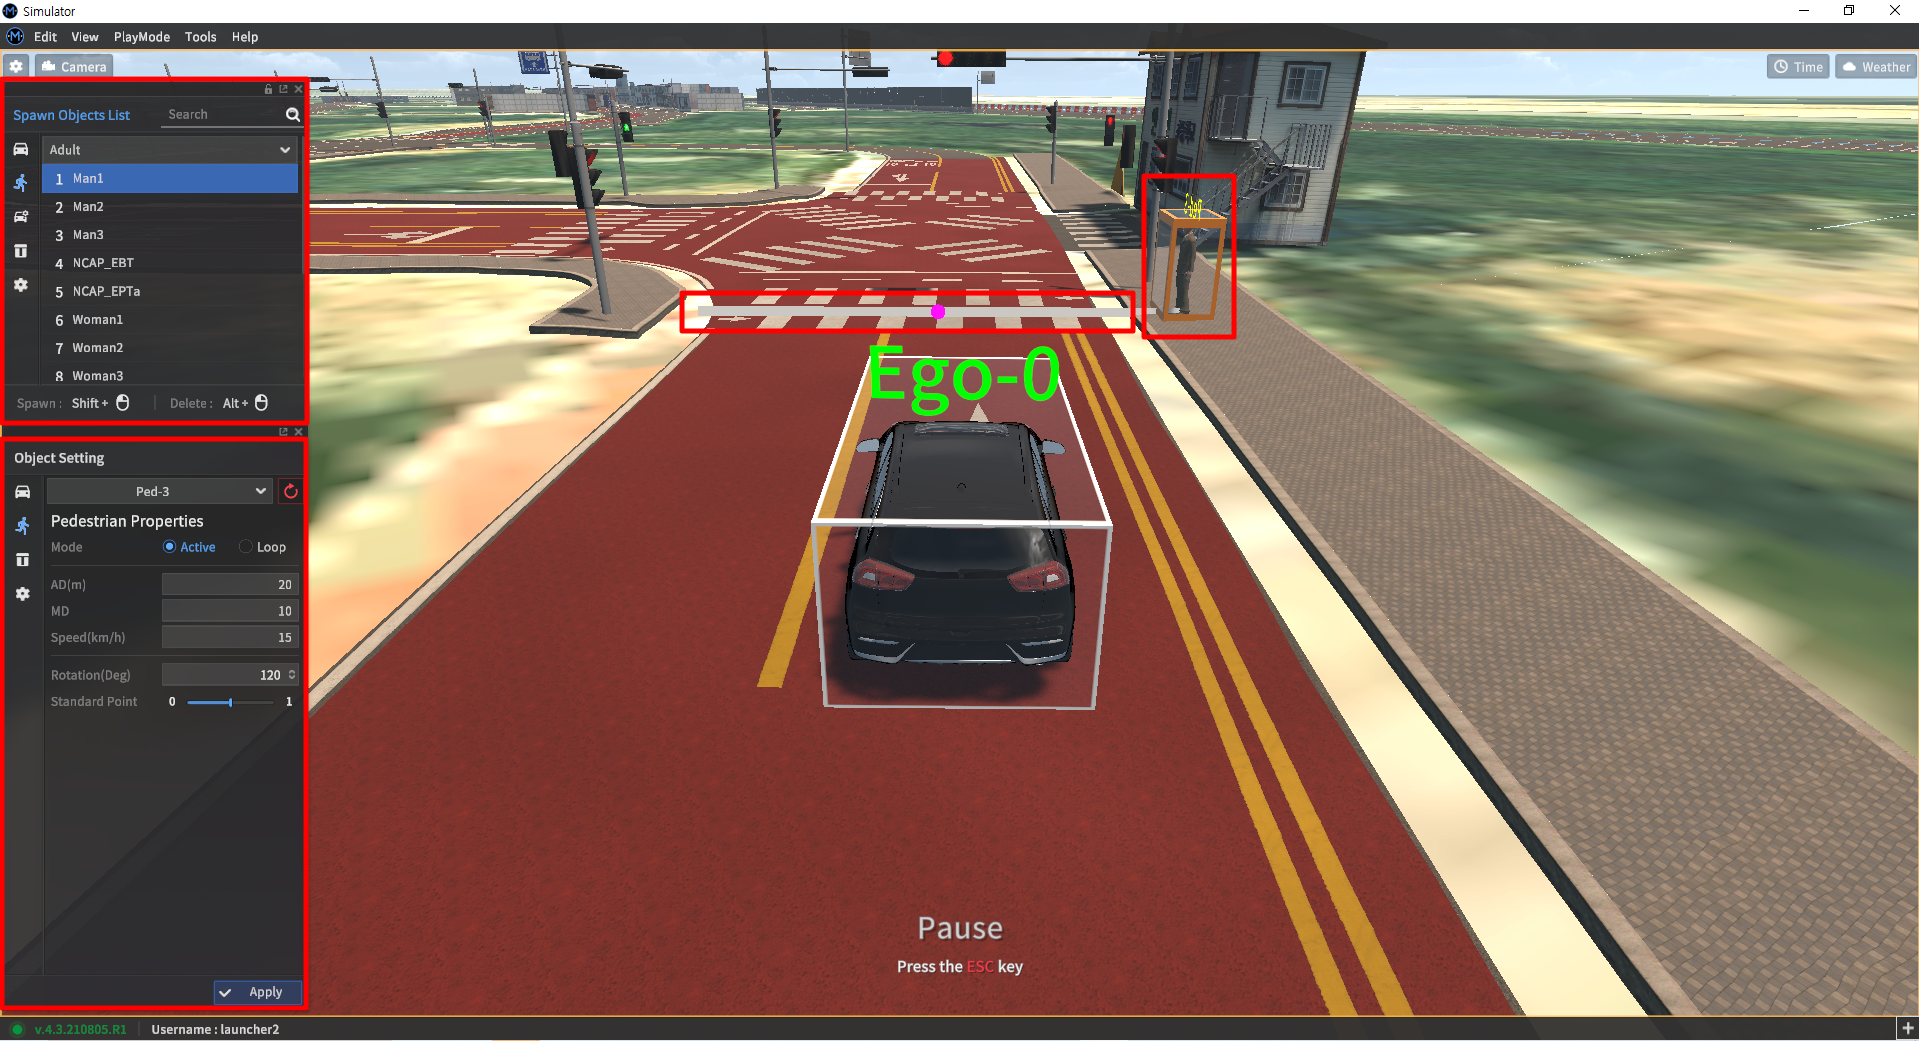
Spawn Objects List - Pedestrian Icon Selection
Select the type of Pedestrian you want.
Shift + left click to create pedestrian and Alt + left click to delete
Pedestrian parameter
AD : active distance
MD : move distance
speed : Pedestrian’s moving speed
Active : checks whether it is being active or not
Loop : checks the number of repetition
standard Point : set the standard point
e.g : Pedestrian’s travel distance is 14m, the No.1 Active will be marked when the vehicle enters within 15m of Standard Point (when selecting Loop, active loop is checked for 15m or less.
Reference video
Motion Pedestrian
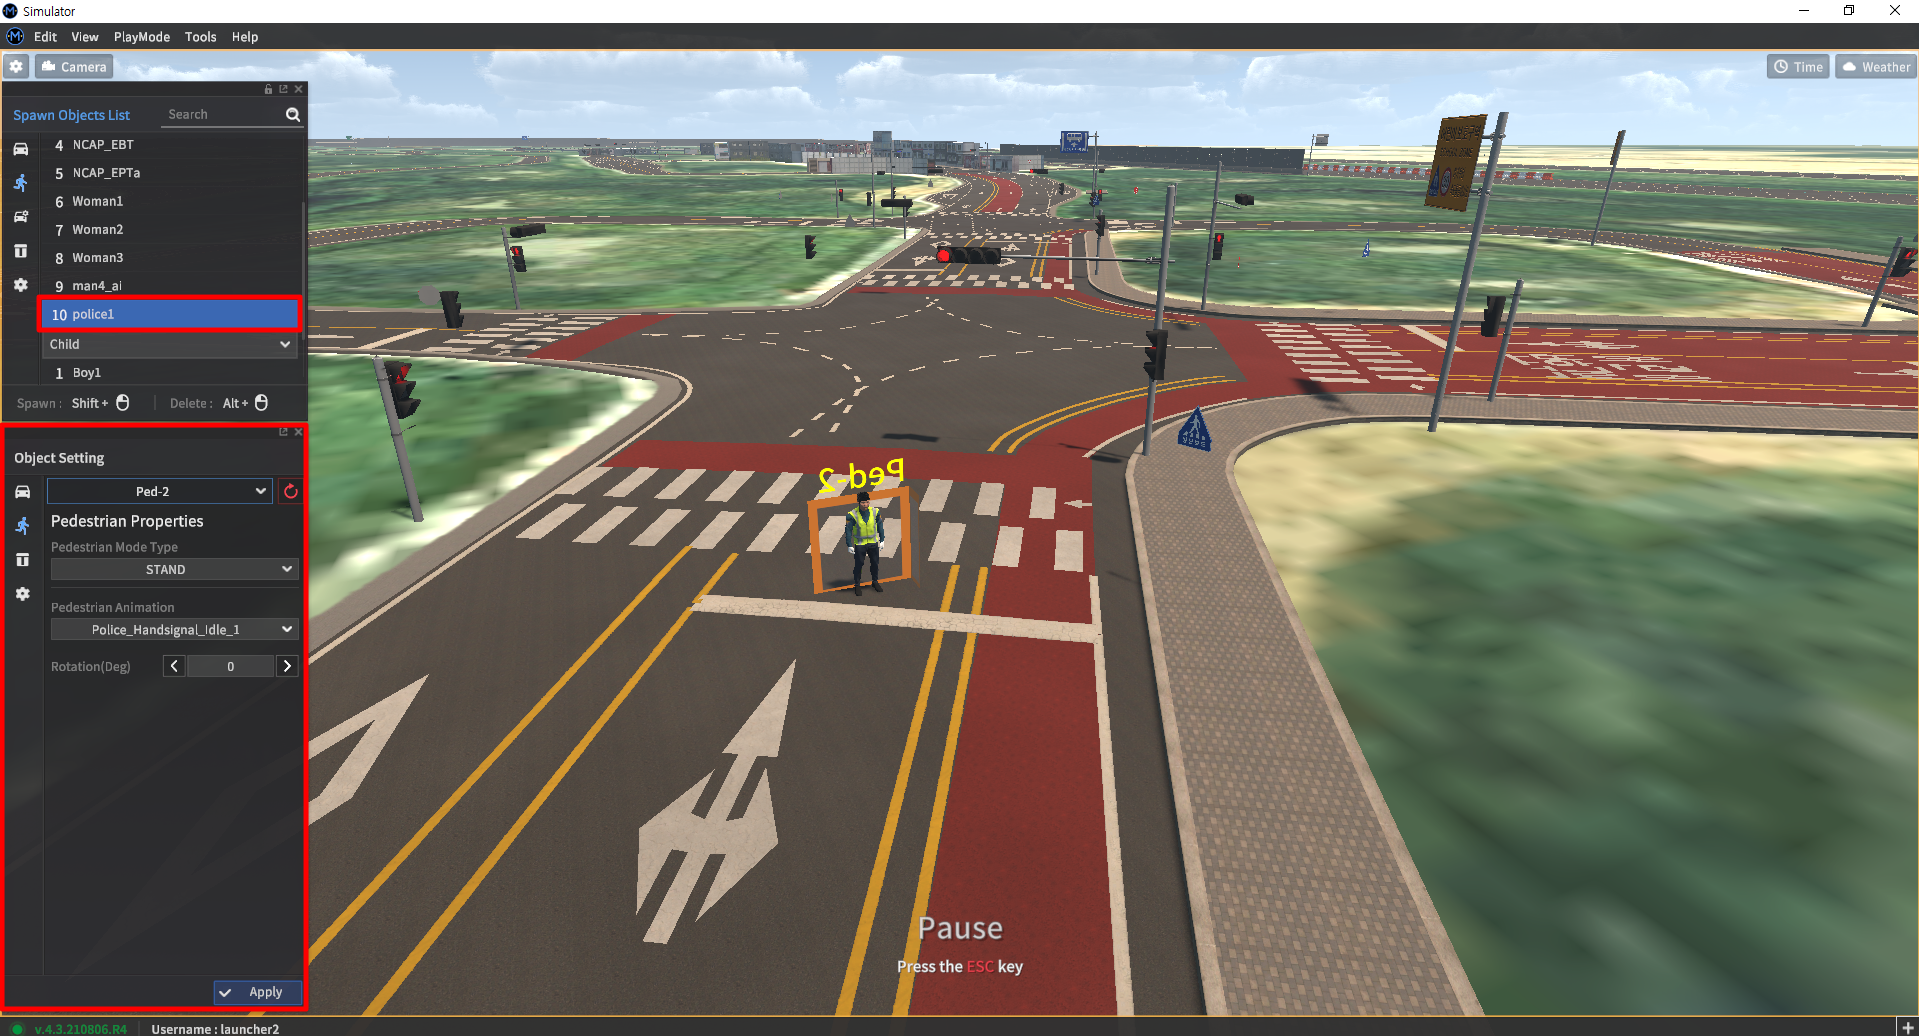
Spawn Objects List - Select Pedestrian
Select police1 or “[pedestrian_name]_ai”
Shift + left click to create pedestrian and Alt + left click to delete
Motion Pedestrian parameter (“This could be used in [pedestrian_name]_ai”)
Pedestrian Mode Type : choose the pedestrian behavior type
ONCE - change destination to idle state when destination is set.
CLOSE LOOP - delete it on arrival of destination.
REPEAT - On arrival of its destination, repeat its process by teleporting toward the original location.
LOOP - make a round trip from departing location to the destination.
NEW PATH - If you have multiple destinations, find another destination when you arrive at the first destination.
STAND - standing in place
Pedestrian Animation : choose Pedestrian Animation
Reference video
Pedestrian SpawnPoint
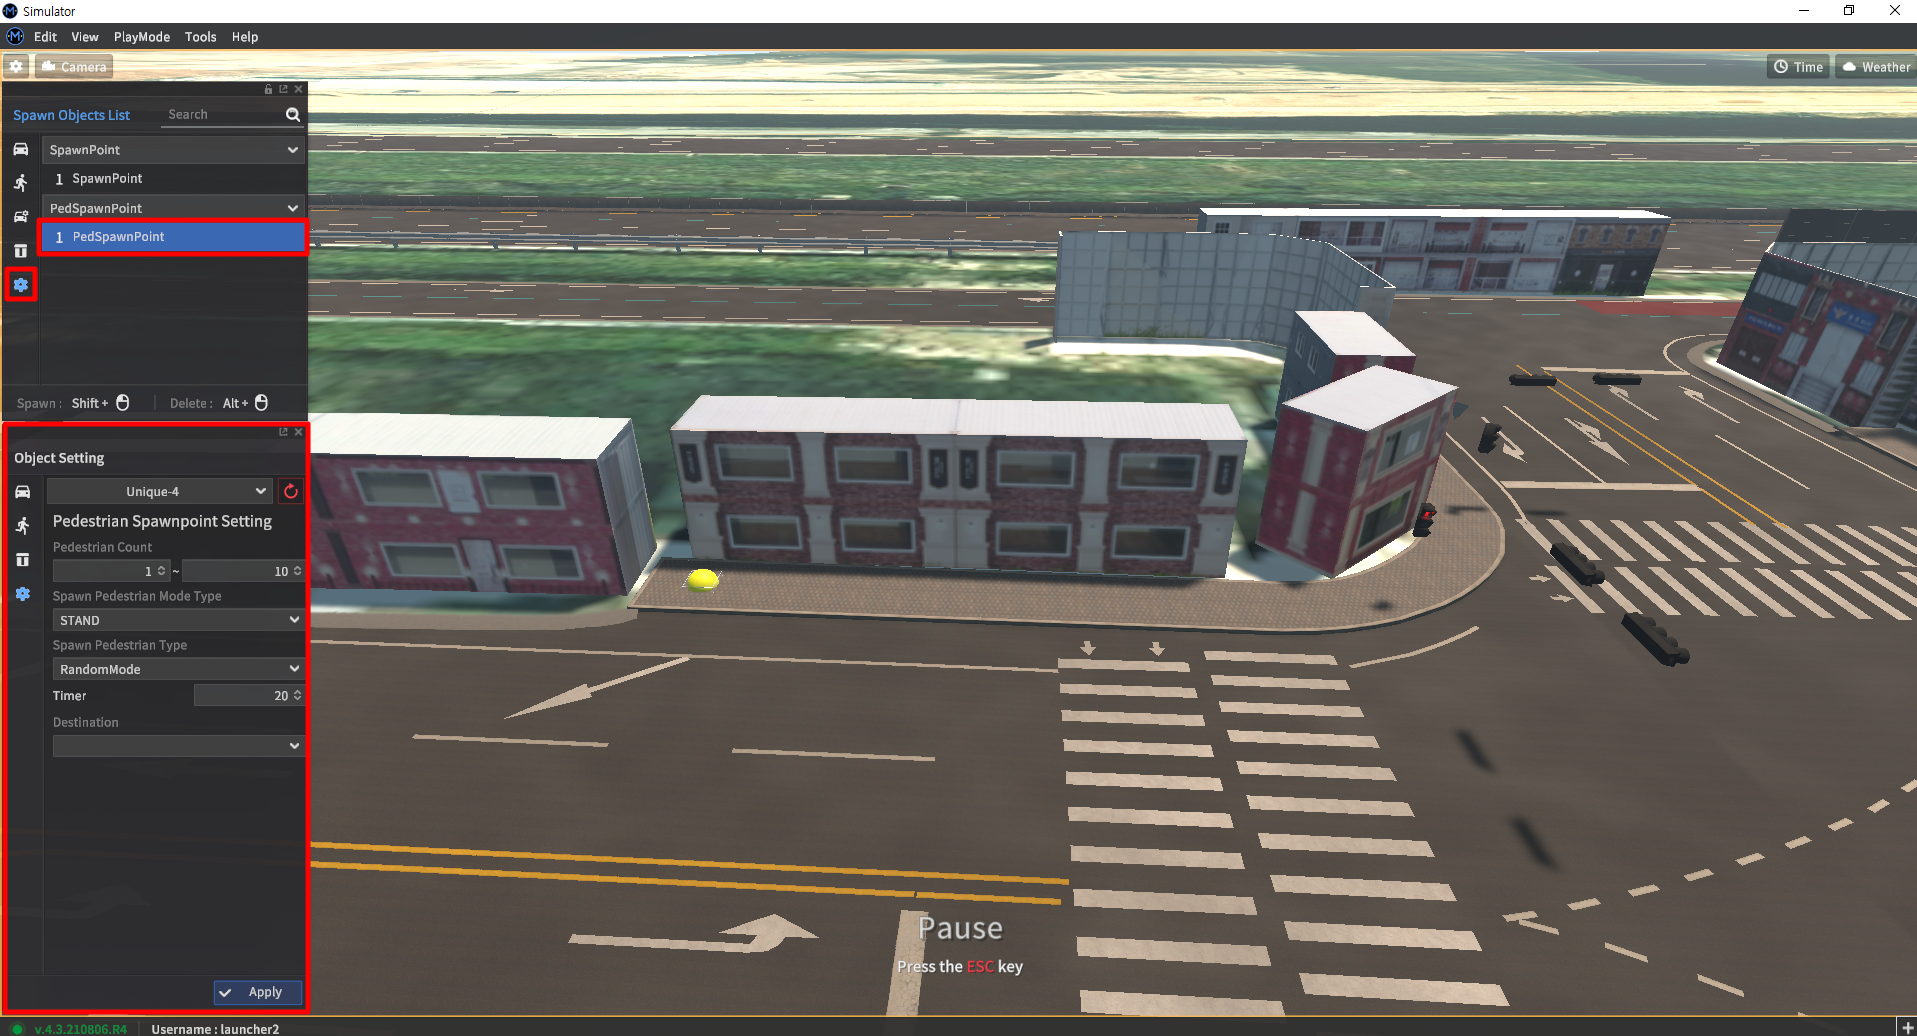
Spawn Objects List - select Spawn Point Icon
Select PedSpawnPoint
Shift + left click to generate Spawn point, Ctrl + click to generate destination point, Alt + left click to delete.
PedSpawnPoint parameter (“This could be used in [pedestrian_name]_ai” )
Pedestrian Count : specify the number of Pedestrians spawned.
Pedestrian Mode Type : select the behavior type of Pedestrian
ONCE - change destination to idle state when destination is set.
CLOSE LOOP - delete it on arrival of destination.
REPEAT - On arrival of its destination, repeat its process by teleporting toward the original location.
LOOP - make a round trip from departing location to the destination.
NEW PATH - If you have multiple destinations, find another destination when you arrive at the first destination.
STAND - standing in place
Pedestrian Animation : select Pedestrian Animation
Timer : select the period of spawned pedestrian cycle.
Destination : Specify destination point
Reference Video
Object Placement

Spawn Objects List - select Object Icon
Select the type of object you want
Shift + left click to create pedestrian and Alt + left click to delete
Object position, angle value can be modified
Select POS, ROT and drag and drop to move the object position / rotateable
POS XYZ : Select the axis (X,Y,Z) you want to modify, enter a value and click '<' or '>' to modify the object position
e.g : Move by x 10
ROT PYR : Select the axis (P,Y,R) you want to modify, enter a value and click '<' or '>' to modify the angle of the object
e.g : rotate pitch 45 degree
Reference Video
Shaded Area Placement
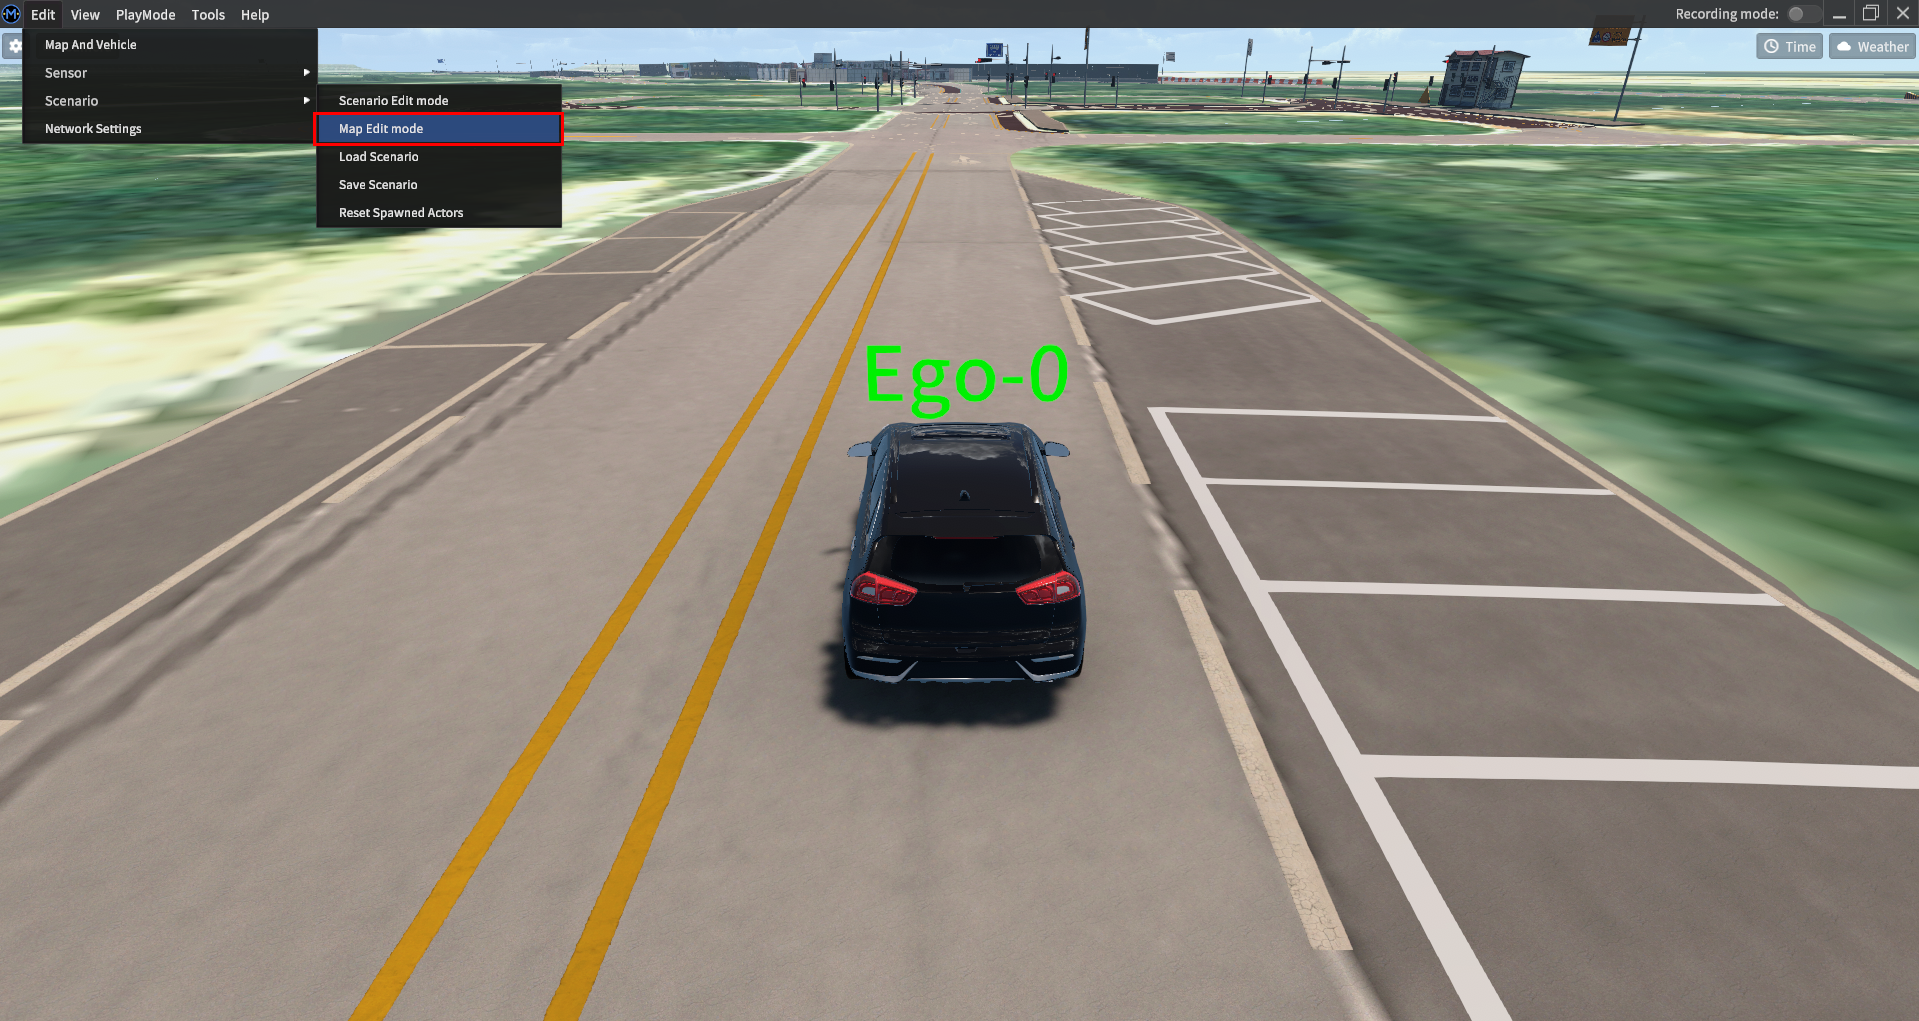
Select Edit - Scenario - Map Edit mode

Select ShadedArea.
Shift + Left click will generate it, and. Alt + Left click will delete it.
Shaded Area’s Size, Position, and Rotation items could be modified.
After selecting Size, Position, and Rotation, you can drag and drop to adjust/move/rotate the Shaded area.
POS XYZ : Select the axis you want to move (X,Y,Z). Enter a value or click, drag and drop to modify the position.
e.g : Move X by 10
ROT PYR : Select the axis (P,Y,R) you want to modify. Enter a value or click, drag, and drop to modify Rotation.
e.g : rotate pitch 45 degree
Size XYZ : Size XYZ: Select the size of axis (size X,Y,Z) you want to modify. Enter a value, click, drag, and drop to modify the size.
e.g : Size Change to X 2.0m
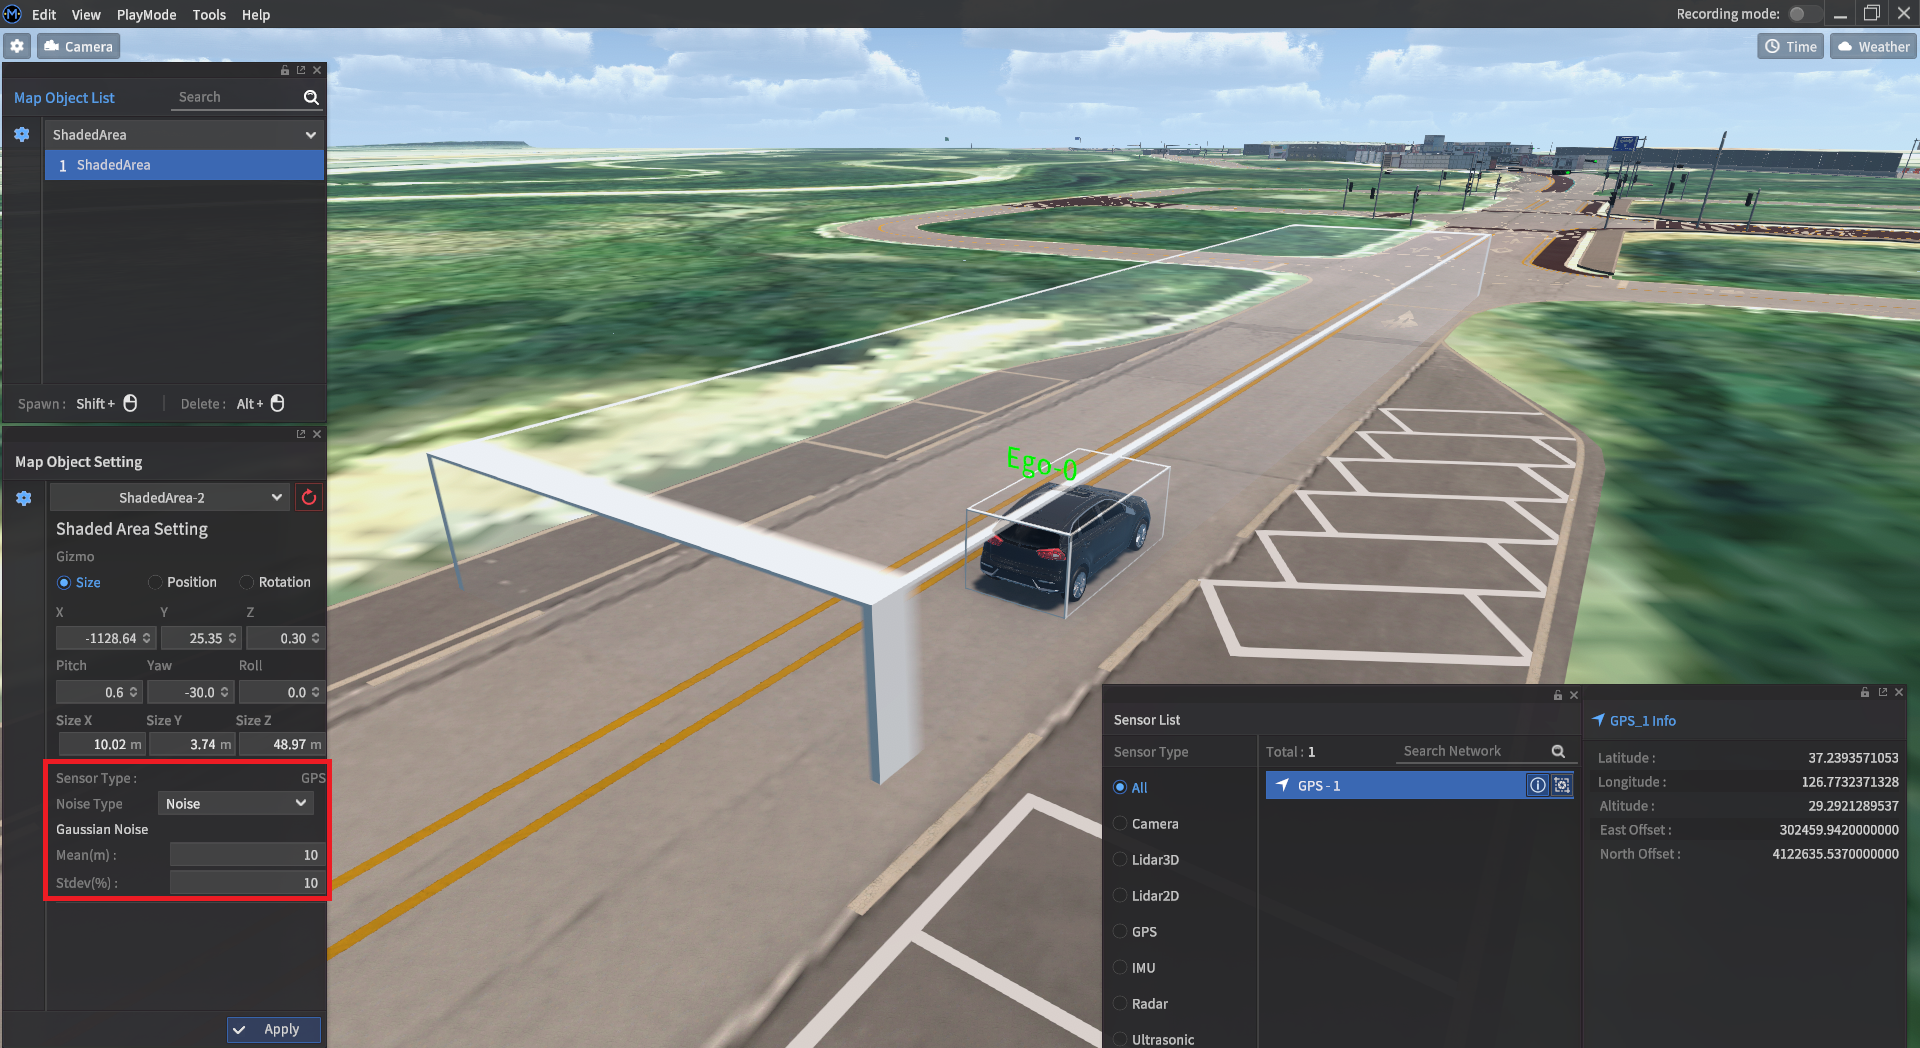
Sensor Type only support GPS.
You can select None/Shading/Noise within the Noise Type.
After GPS Sensor is placed, GPS Info can be checked according to the Noise Type of the Shading Area through View-Sensor List.
When None under Noise Type is checked under the setting, there is not any change in GPS output value.
When shading setting is checked under Noise Type, the output value of Latitude, Longitude, Altitude respectively is 0.
When Noise is checked under Noise Type, GPS outvalue is dependent on Mean under Gaussian Noise and Stdev input.
Scenario Management
Save
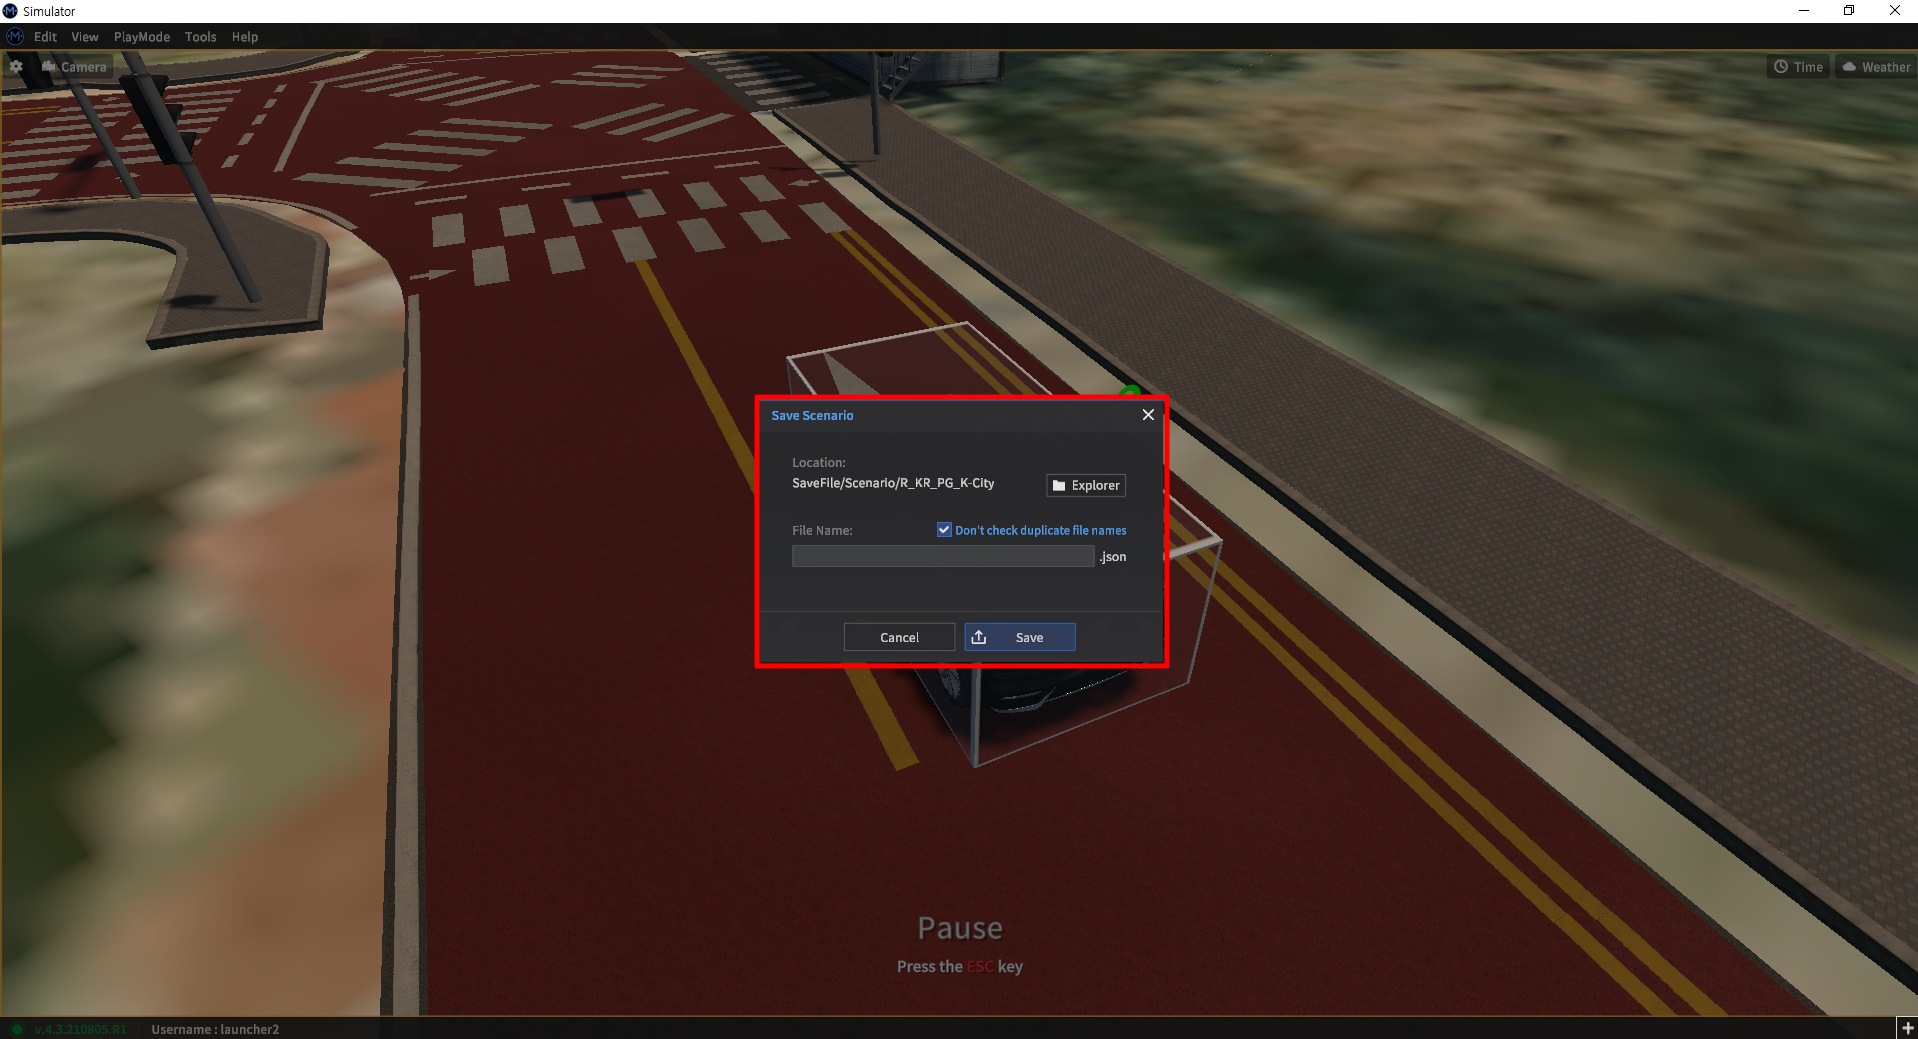
Click on the following order: Spawn Objects List - Scenario - Save Scenario
Information about one’s current vehicles, vehicles, pedestrians, and obstacles can be saved.
Load
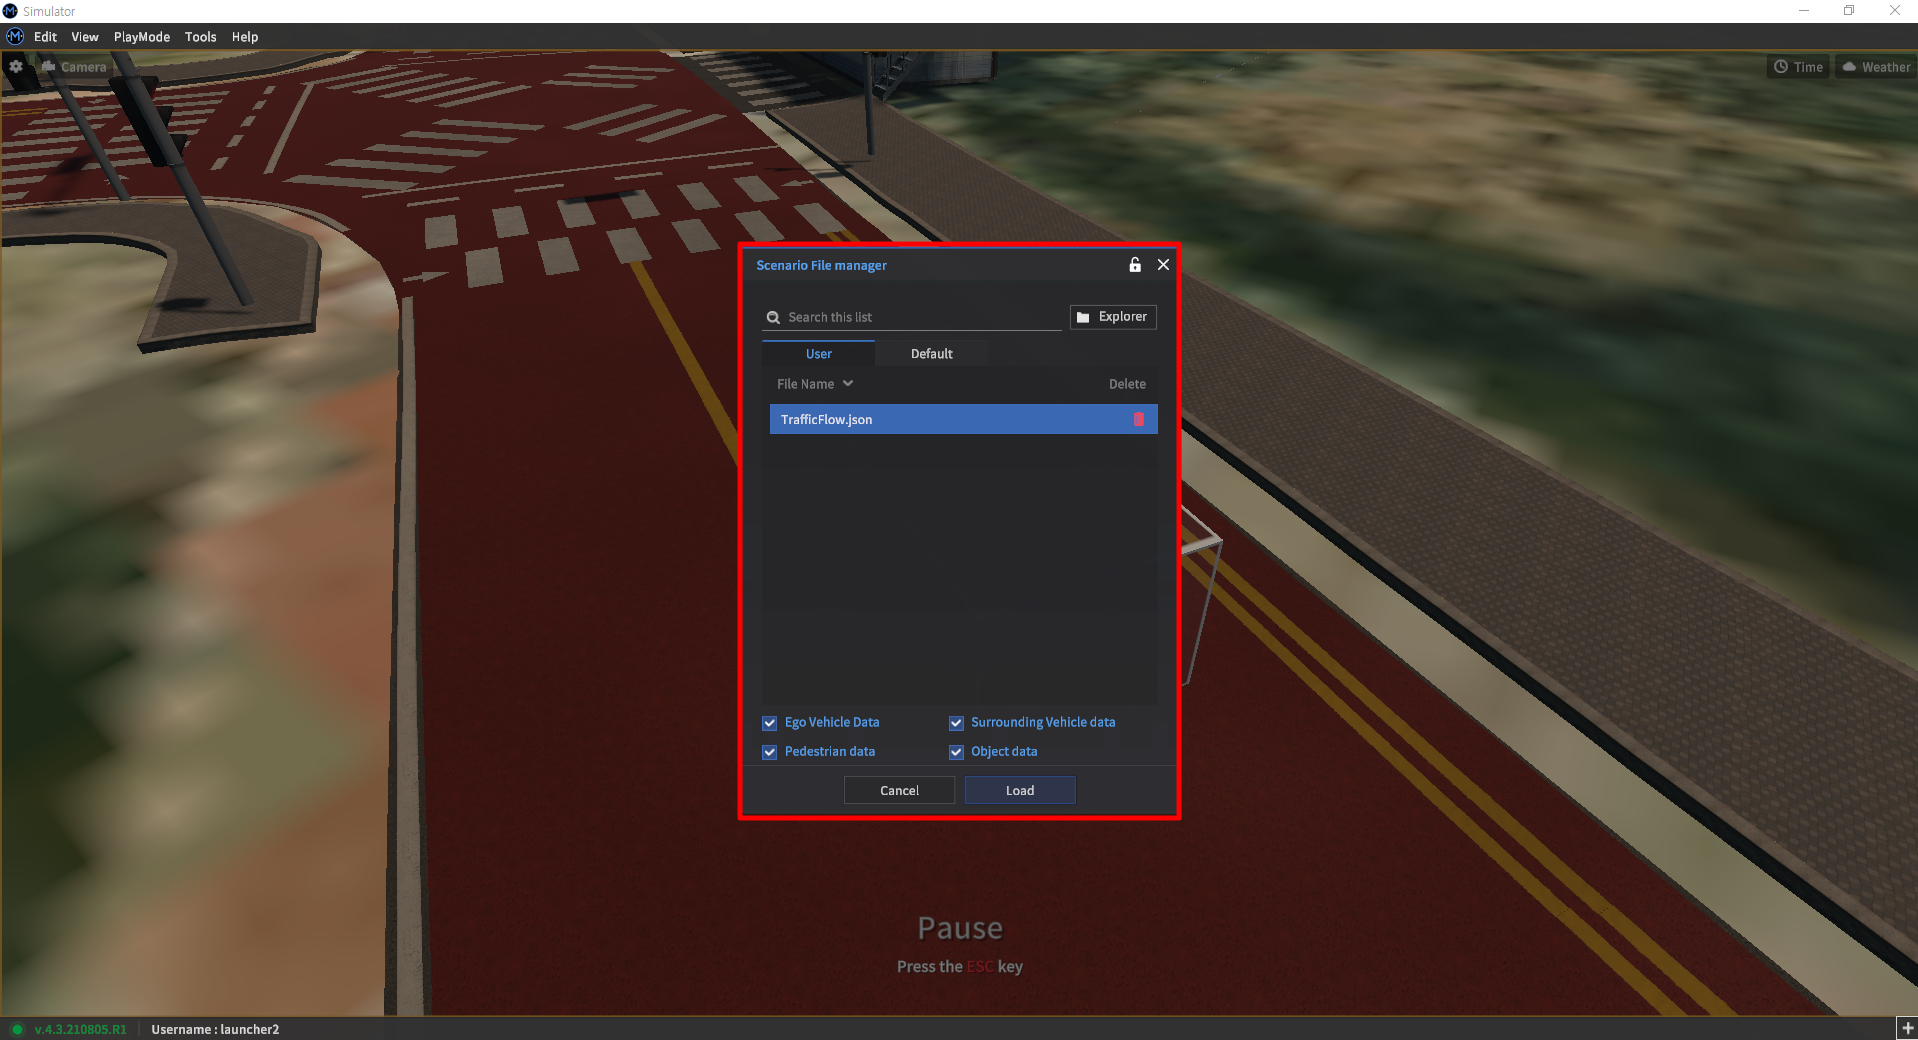
Click on the following order: Spawn Objects List - Scenario - Load Scenario
Information about one’s current vehicles, vehicles, pedestrians, and obstacles can be b.
Reset
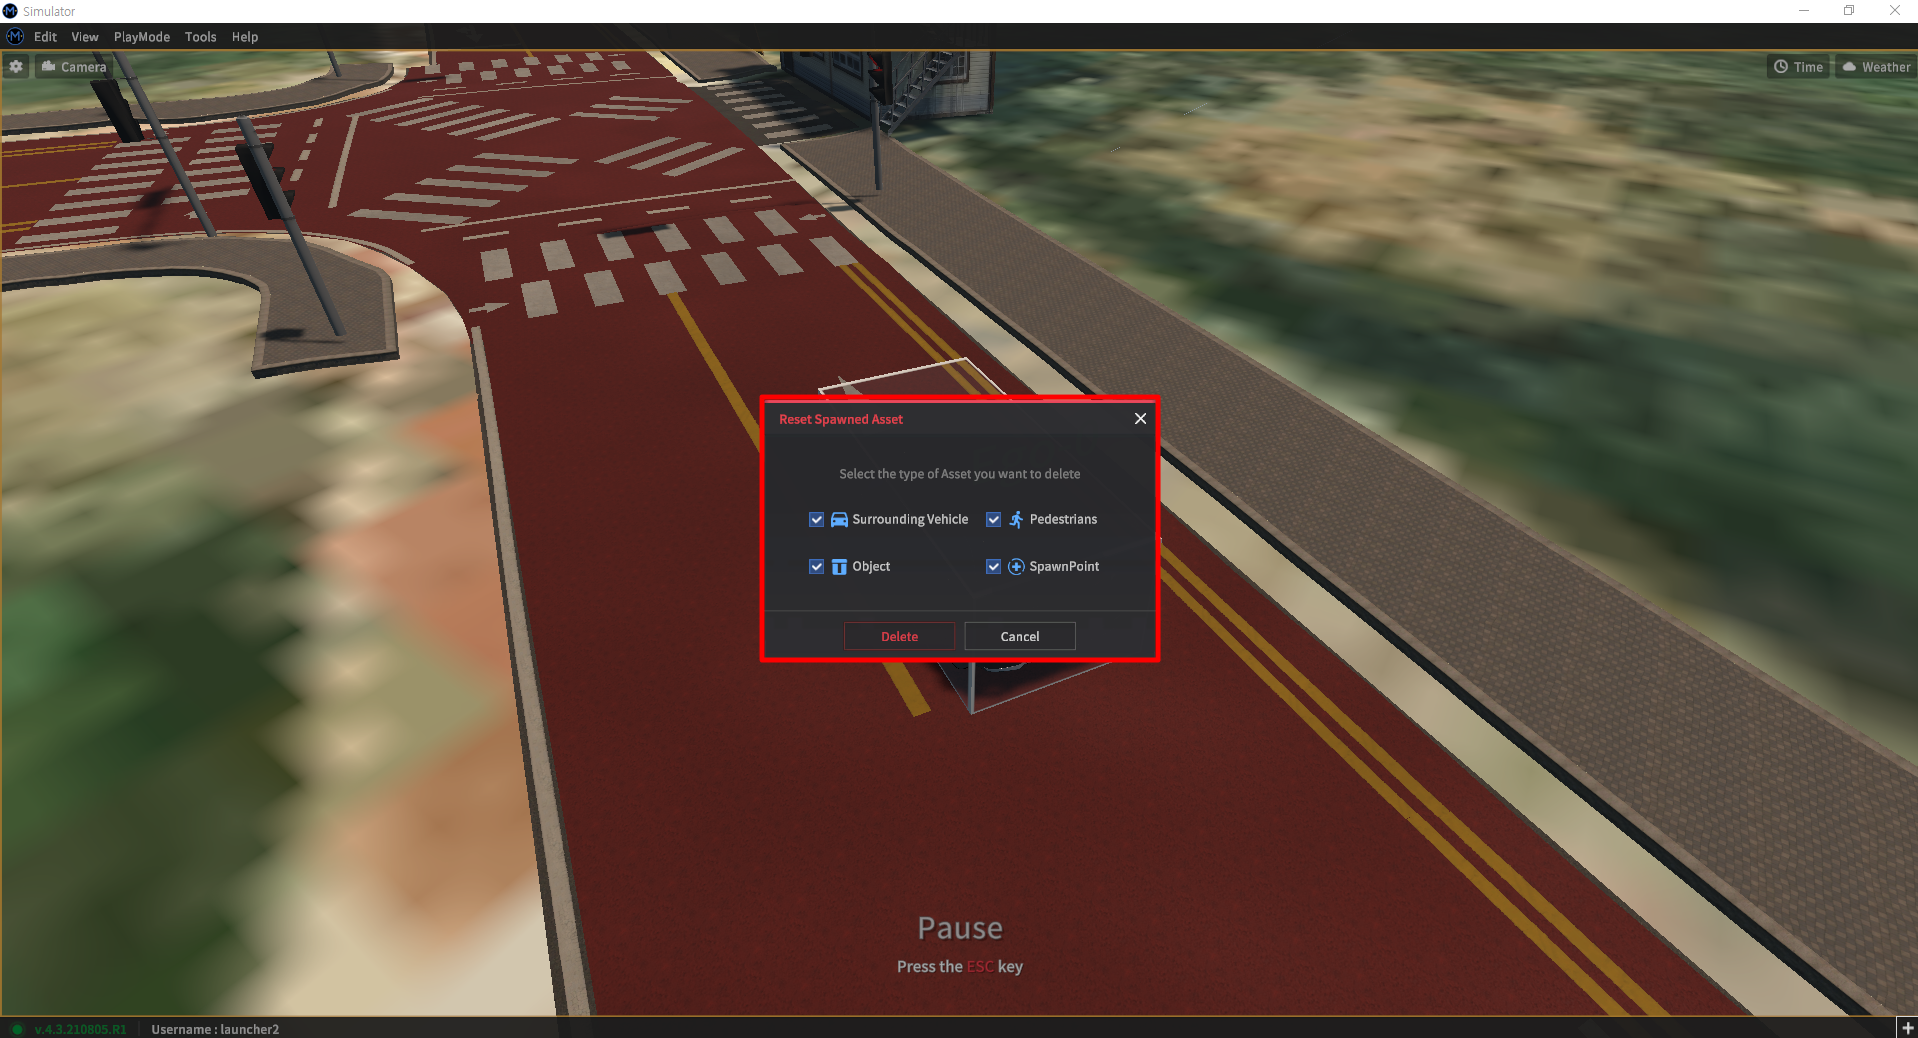
Click on the following order: Edit - Scenario - Reset Spawned Actors
All vehicles, pedestrians and obstacles in the current map can be initialized in batches.